Enable Password-less SSH on Synology DSM 6
Synology does not enable password-less ssh by default on their NAS devices. Here’s how to do it yourself in DSM v6.0.
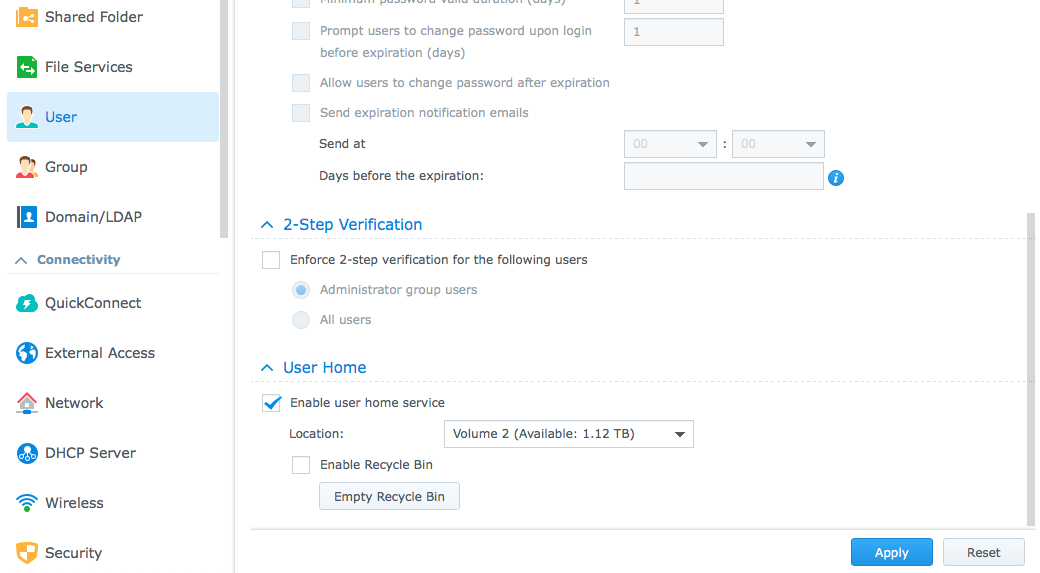
- Enable User Home in the Synology web UI Control Panel.

- Enable SSH. You should enable telnet right now as well as you may need it later. Just make sure to disable telnet after you’re done setting up passwordless ssh so you don’t accidentally connect with a non-secure channel in a non-exceptional circumstance.

- Choose a
<username>in the administrators group. You can use a non-admin user but you’ll need to manually edit/etc/passwdto give them shell access (replace/sbin/nologinwith/bin/sh) and this edit may not survive a reboot or update. - From a client computer login as admin via ssh then set permissions on the user directory so the SSH daemon doesn’t reject the configuration.
ssh admin@<synology_ip> chmod 755 /volume<volume_number>/homes/<username> - Close the
adminssh session then login as the user chosen in step 3.ssh <username>@<synology_ip> - Create the ssh folder and authorized_keys file with proper permissions. If you haven’t already, generate a local ssh key on the NAS for this user.
mkdir ~/.ssh chmod 0700 ~/.ssh touch ~/.ssh/authorized_keys chmod 0644 ~/.ssh/authorized_keys ssh-keygen (accept defaults) - Backup the existing sshd_config
sudo cp /etc/ssh/sshd_config /etc/ssh/sshd_config.bak --verbose - Edit the ssd daemon configuration
sudo vi /etc/ssh/sshd_configand ensure these properties are set and uncommented.PubkeyAuthentication yes AuthorizedKeysFile .ssh/authorized_keys ChallengeResponseAuthentication no - Restart sshd then end the session. If you can’t get in after this step you messed up the config in step 8 so telnet in (make sure telnet is enabled the same place as SSH in Step 2)and restore the backup. If you use macOS like me and you’re on High Sierra you’ll note Apple removed telnet. Instead use
nc -ct <synology_ip> 23NOTE: Sometimes the service restart can fail when performed over ssh even if the config is fine. In this case, run the restart command from telnet again.sudo synoservicectl --restart sshd exit - On the client computer copy do
ssh-keygenthen copy the local public key to the NASssh-copy-id -i ~/.ssh/id_rsa.pub -p <port_number> <username>@<synology_ip> - Test it!
ssh -p <port_number> <username>@<synology_ip>